A configured and enabled Moxie log system is capable of reporting a large volume of log data. Log data itself does not present a comprehensive picture of the information within it because it is a collection of records containing highly detailed information. Each record contains specific information about an event that occurred on a Moxie network. Once collected, this data can be processed into log reports which can better explain and illustrate the information.
In order to process Moxie log data, there are recommended system configurations and requirements that should be implemented – such as configuring SQL Report Services – and the steps required to create a basic report.
Before proceeding, the following knowledge and technical requirements are recommended:
- Administrative knowledge of Moxie
- SQL Server 2008 R2 (or higher) installed
- SQL Report Services Installed
- An installed and configured Log Server
- Appropriate credentials for read access of the Log Server databases
- Content logs collected in the Log Server
Scope
This document is intended as a starting point from which a fully-functional, content-rich playback reporting system can be configured, dependant on reporting requirements. It discusses how to use SQL Reporting Services to generate reports, however any compatible and appropriate 3rd-party reporting tool can be used (e.g. Crystal Reports).
Note: SQL Server 2008 R2 or higher is required for the Omnivex Moxie logging function.
Visit the Omnivex Forums for more information. The forums contain feedback from a comprehensive group of contributors to common questions about Omnivex products, including logging.
Start SQL Report Services
-
Start Reporting Services Configuration. Select the appropriate start method for your particular version of Microsoft Windows:
- On the Windows task bar, click the Start button. In the Search programs and files search box, type Reporting and select Reporting Services Configuration Manager from the search results.
- Click Start > All Programs > Microsoft SQL Server 2008 R2 > Configuration Tools
- Click Reporting Services Configuration Manager.
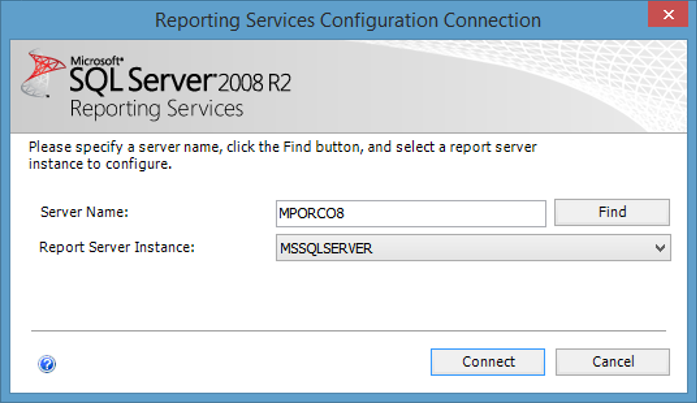
- In Server Name, type the name of the computer on which the Report Server is located. The name of the local computer typically appears by default, but you can type the name of a remote computer. If specifying a remote computer, click Find to establish a connection.
- In Report Server Instance, select the SQL Server Reporting Services instance you want to configure. Only Report Server instances for the current version of SQL Server appear in the list, as you cannot configure earlier versions.
- Click Connect.
Building a basic report using SQL Reporting
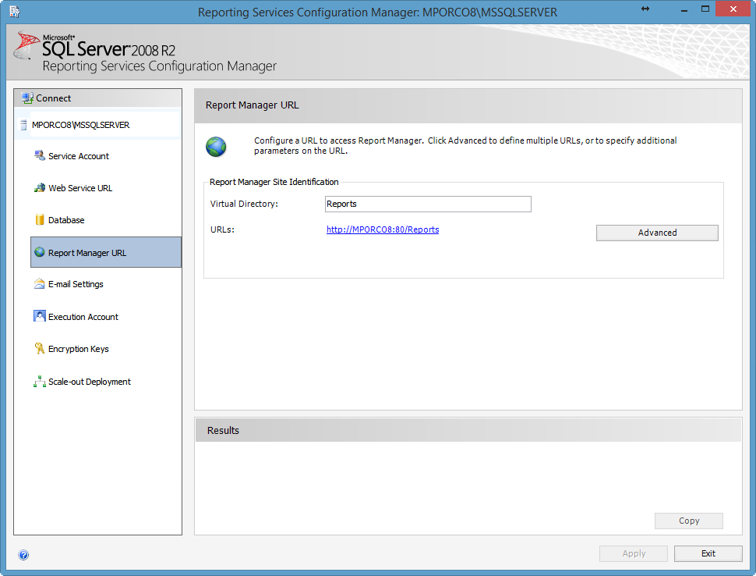
The default Report Manager URL format is http://<SQL_Server>/Reports. Replace <SQL_Server> with the name of the SQL Server instance.
To change the default URL:
- Start Reporting Services Configuration Manager.
-
In the left pane click Report Manager URL.
-
Configure the URL.
Note: If an error occurs, when attempting to sign into Report Manager, that indicates inappropriate levels of permissions. Try signing in again, using Microsoft Internet Explorer or Google Chrome, run as an Administrator. Microsoft Report Builder does not support Mozilla Firefox.
When authentication has completed, SQL Server Reporting Services home page appears.
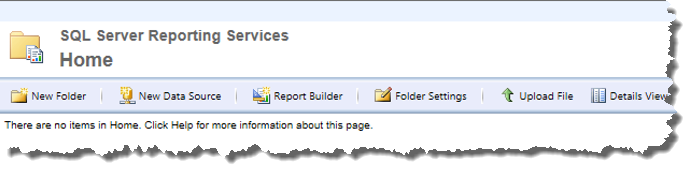
-
Click Report Builder. Microsoft SQL Server Report Builder appears and automatically starts the Getting Started wizard.
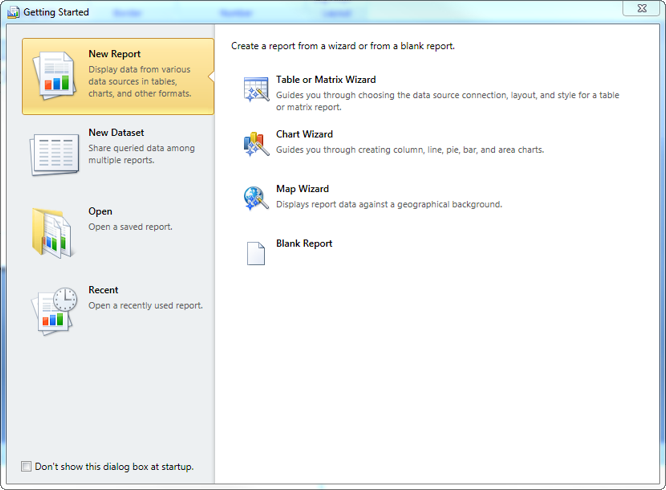
- In the left pane, click New Report, if unselected.
-
In the right pane, select:
- Table or
- Matrix Wizard
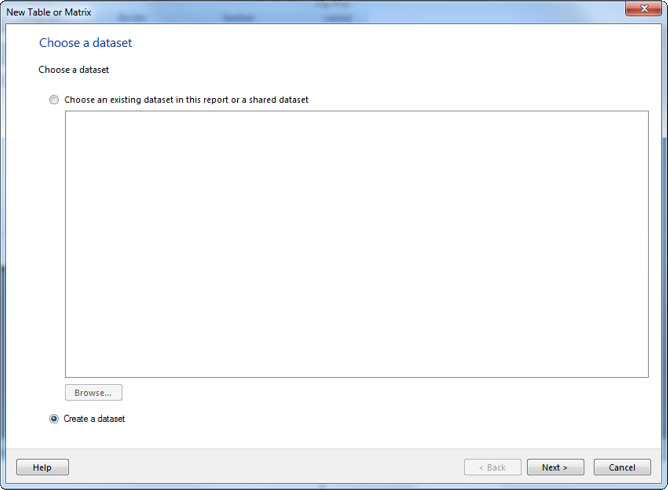
- Select Create a dataset.
-
Click Next.
-
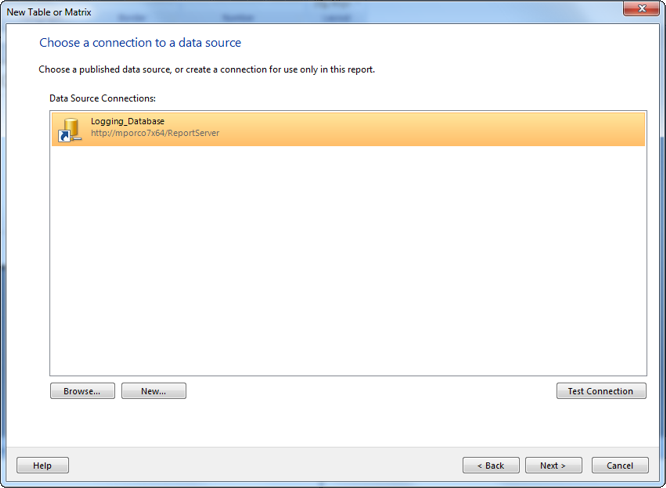
In Data Source Connections:
- select an existing database or
- click New to create a new one
- Once a Data Source is selected or created, log on to the server using an account with Read permission for the Log Database. The wizard changes and the Design a Query page appears.
- Click Edit as Text and ensure that Command type is Text.
-
Copy and paste the SQL query text below into the top text box of the wizard:
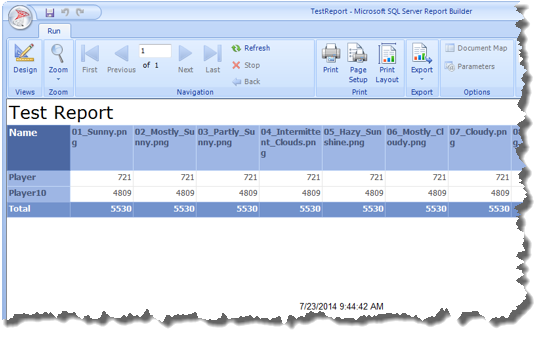
This query extracts a player’s name and its content display history data. This data is presented in a table and displays the number of times that a particular content item displayed since logging content began.Select dbo.ApplicationInstance.Name as 'Player_Name', dbo.DynamicValue.TextValue as 'Log_Item' From dbo.Log INNER JOIN dbo.Source ON dbo.Source.ID = dbo.Log.SourceID INNER JOIN dbo.ApplicationInstance ON dbo.ApplicationInstance.ID = dbo.Source.ApplicationInstanceID ON dbo.logType.ID = dbo.Log.LogTypeID INNER JOIN dbo.DynamicValueSet ON dbo.DynamicValueSet.ID = dbo.Log.DynamicValueSetID INNER JOIN dbo.DynamicValueSetDynamicValue ON dbo.DynamicValueSetDynamicValue.DynamicValueSetID = dbo.DynamicValueSet.ID INNER JOIN dbo.DynamicValue ON dbo.DynamicValue.ID = dbo.DynamicValueSetDynamicValue.DynamicValueID WHERE dbo.DynamicValue.DynamicColumnID = 3 - Click the ! button to execute the query. The results display under the query text.
-
Edit the query text to suit your reporting requirements. When satisfactory results are presented, click Next. The Arrange fields page appears.
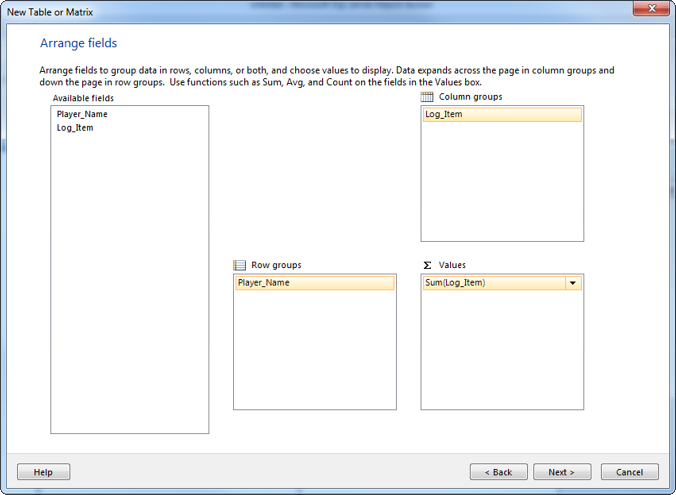
-
In the Available fields list, drag:
- Log_Item to Column Groups
- Player_Name to Row Groups
- Log_Item to Values and select Sum from the menu that appears.

- Click Next.
- Click Next.
-
Select a color scheme and click Next. Configuration of the Table or Matrix Wizard is now complete. The wizard closes and you return to Microsoft SQL Server Report Builder.
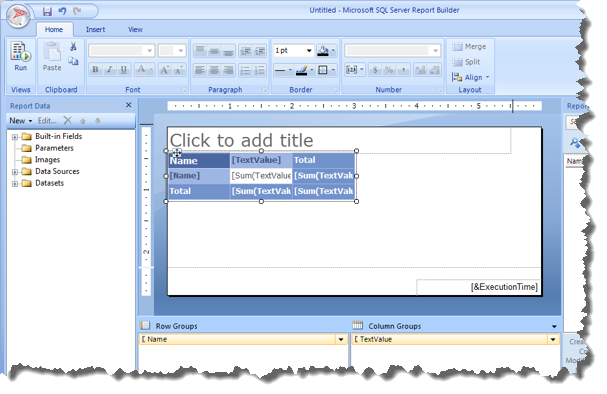
- Click on Click to add a title and type the title for the report.
-
In the Home tab of the ribbon, in the Views command group, click Run. The report executes and displays the results.
- Click SQL Server Report Builder (located at the top left of the window) and click Save.
- Type a name for the report.
- Click Save. The new report is now available on the SQL Server Reporting Services homepage.
Additional queries
Today’s logs
This query has a modification to the ‘WHERE’ clause whereby only the current day’s logs are displayed.
Select dbo.ApplicationInstance.Name as 'Player_Name',
dbo.DynamicValue.TextValue as 'Log_Item'
From dbo.Log
INNER JOIN dbo.Source
    ON dbo.Source.ID = dbo.Log.SourceID
INNER JOIN dbo.ApplicationInstance
    ON dbo.ApplicationInstance.ID = dbo.Source.ApplicationInstanceID
INNER JOIN dbo.LogType
    ON dbo.logType.ID = dbo.Log.LogTypeID
INNER JOIN dbo.DynamicValueSet
    ON dbo.DynamicValueSet.ID = dbo.log.DynamicValueSetID
INNER JOIN dbo.DynamicValueSetDynamicValue
    ON dbo.DynamicValueSetDynamicValue.DynamicValueSetID = dbo.DynamicValueSet.ID
INNER JOIN dbo.DynamicValue
    ON dbo.DynamicValue.ID = dbo.DynamicValueSetDynamicValue.DynamicValueID
WHERE dbo.DynamicValue.DynamicColumnID = 3 and
Convert(date,Log.IncidentDateTimeUTC) = convert(date, GETDATE()))
Note: Any date can be entered by replacing convert(date, GETDATE())) with a date in the format "YYYY-MM-DD".
Report based on metadata value
This query configures a report to be created which uses a single metadata value as search criteria. Only content matching the metadata value in the query is returned in the results.
Select dbo.ApplicationInstance.Name as 'Player_Name',
dbo.DynamicValue.TextValue as 'Log_Item', dbo.ItemMetaData.TextValue
From dbo.Log
INNER JOIN dbo.Source
    ON dbo.Source.ID = dbo.Log.SourceID
INNER JOIN dbo.ApplicationInstance
    ON dbo.ApplicationInstance.ID = dbo.Source.ApplicationInstanceID
INNER JOIN dbo.DynamicValueSet
    ON dbo.DynamicValueSet.ID = dbo.Log.DynamicValueSetID
INNER JOIN dbo.DynamicValueSetDynamicValue
    ON dbo.DynamicValueSetDynamicValue.DynamicValueSetID = dbo.DynamicValueSet.ID
INNER JOIN dbo.DynamicValue
    ON dbo.DynamicValue.ID = dbo.DynamicValueSetDynamicValue.DynamicValueID
INNER JOIN dbo.ItemMetaDataSet
    ON dbo.ItemMetaDataSet.ID = dbo.Log.ItemMetaDataSetID
INNER JOIN dbo.ItemMetaDataSetItemMetaData
    ON dbo.ItemMetaDataSetItemMetaData.ItemMetaDataSetID = dbo.ItemMetaDataSet.ID
INNER JOIN dbo.ItemMetaData
    ON dbo.ItemMetaData.ID = dbo.ItemMetaDataSetItemMetaData.ItemMetaDataID
WHERE dbo.DynamicValue.DynamicColumnID = 3 and Convert(date,Log.IncidentDateTimeUTC) = convert(date, GETDATE())and dbo.ItemMetaData.TextValue = 'MetaDataValue'
Note: "MetaDataValue" must be replaced with the metadata value intended to be the search criteria.