Omnivex Ink – Reference Explorer
1. Introduction
Ink is a highly flexible system that allows reuse and nesting of items. This power can lead to a wide range of interconnections and references between various items that isn’t always obvious. Many of these references can chain together and link items across several hops.
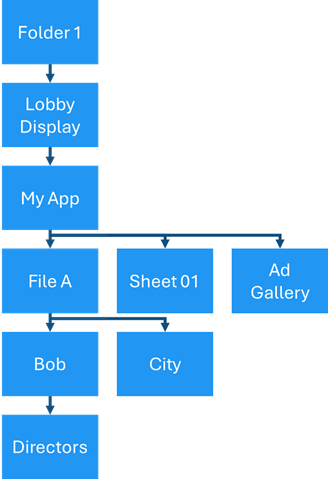
For example,
- Folder 1 could contain (and therefore reference) Lobby Display.
- Lobby Display could be showing (and referencing) My App.
- My App could use File A, databind to Sheet 01, and rotate through content in Ad Gallery. More references.
- File A could be shared with User Bob and have a City Metadata value.
- User Bob could be a member of the Directors Group.
The Reference Explorer, or REx, is a tool that allows you to travel through these references and chains to discover and validate which items make use of others.
2. Map of references
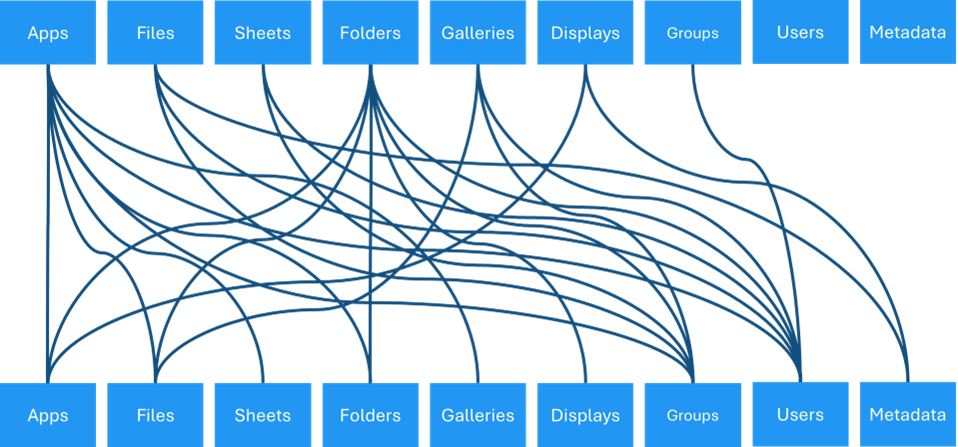
The following map illustrates the various possible connections between item types in Ink. The curved lines illustrate which item types on the top row can reference which item types on the bottom row. These are the paths that the Reference Explorer allows you to travel.
For example,
- Files can be shared with Groups and Users, and have Metadata values.
- Displays can be showing Apps and also have Metadata values.
- Groups can only contain Users.
- Users and Metadata values do not reference other item types.
3. Using the REx
Reference chains can be lengthy or even loop back on themselves. The REx displays one reference level up and one reference level down at all times and allows you to move up and down through the chain.
The selected item is shown in the middle section. Items that reference the selected item are listed in the top section. Items that are referenced by the selected item are listed in the bottom section.
Since many items types can be referenced by, or can reference multiple other item types, (as illustrated in the reference map) the top and bottom sections contain tabs for each of the valid item types for the selected item. The number in the tab indicates the quantity of items of that type with a reference link to the selected item.
Use the reference explorer button ( ![]() ) beside each item to select that item and move it to the middle section. This is how you can step through the chains as the top and bottom sections will update based on the existing references to that item.
) beside each item to select that item and move it to the middle section. This is how you can step through the chains as the top and bottom sections will update based on the existing references to that item.
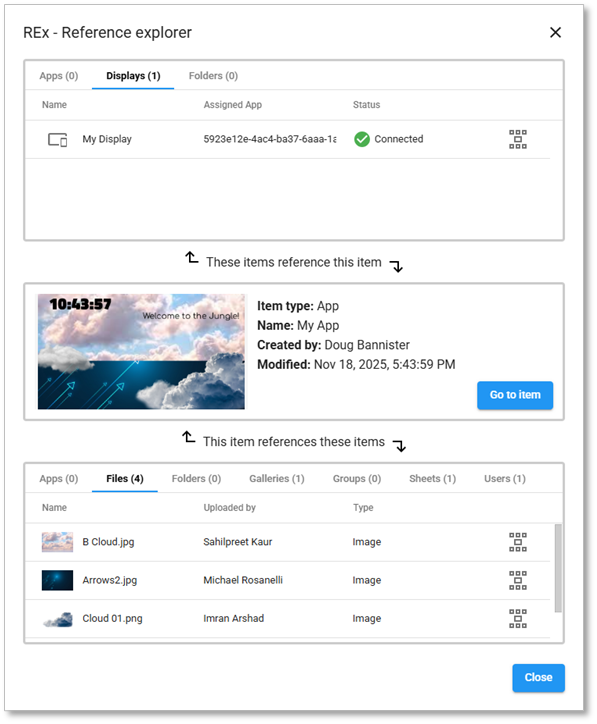
By selecting My App, you can see it is used on My Display, and that it uses 4 Files, 1 Gallery, 1 Sheet, and is shared with 1 User.
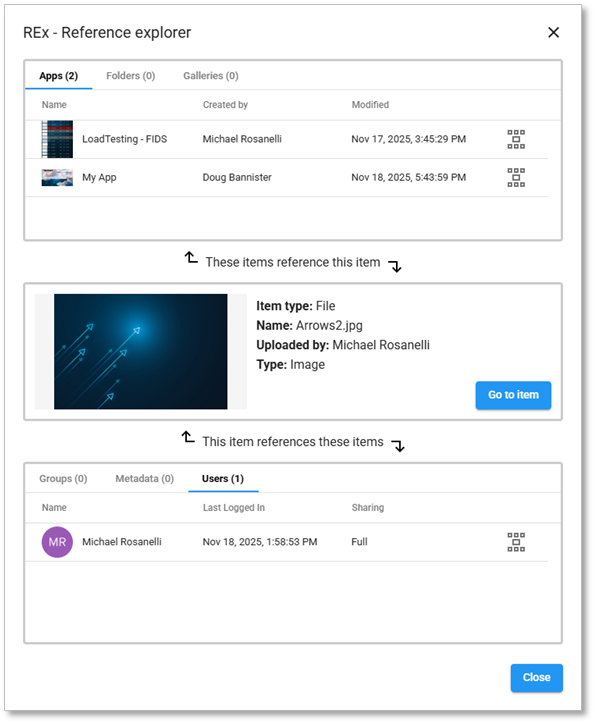
Click on the REx button beside Arrow2.jpg and it becomes selected. You can see it is used in 2 different Apps and is shared with 1 User.
4. Launching the REx
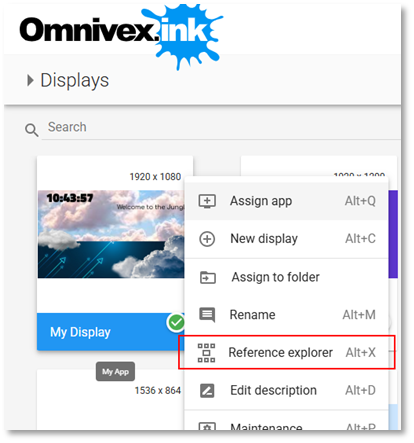
Any item in Ink can be used to launch the Reference Explorer. Find the item of interest in its showcase and either right click on it to access the context menu, or use the toolbar three dot menu to launch the REx and start exploring.
You can only select a single item at a time to open the REx since that is the one focal point that references are shown in relation to. If you select multiple items you will note that the REx is not available as an option in the menu.
5. Go to Item
Often when tracing through the reference chain it is desirable to access the selected item to do some work with it. This is accomplished with the Go to Item button. This button can only be used to go to the selected item.
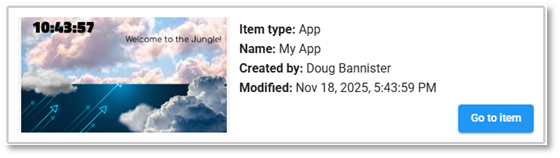
When you click on the button Ink will open a new tab in your browser, open the showcase for that item type, and perform an advanced search for the id of the selected item. This ensures that the new tab only shows that one selected item with the references that you were just looking at.
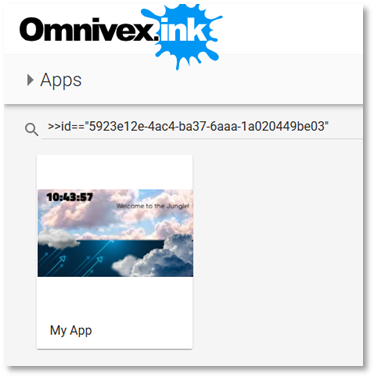
Doing it in this way ensures that if you have five copies of cat.jpg in Ink and you want to find which one is used in one app, you can verify that this particular one is the proper copy.